There are three phases to setting up the F5’s SSL Bridge configuration.
1. Install Certificates
2. SSL Profiles (Client and Server)
3. Virtual Server (HTTP and HTTPS)
The purpose in setting it up in Bridge mode is because we want to re-encrypt the traffic going back to the servers in the cluster pool. I have a blog post explaining the different options.
Before we begin, I’ll show you have to get the intermediate cert.
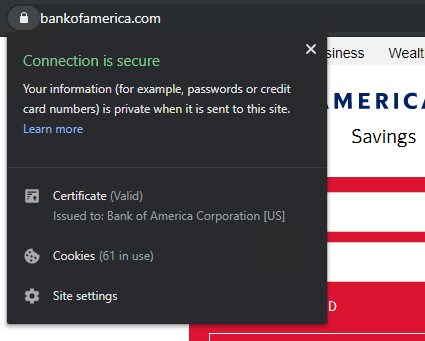
Go the the domain you want to get the Intermediate cert from. Click on the Lock Icon, then click “Certificate (Valid)”:
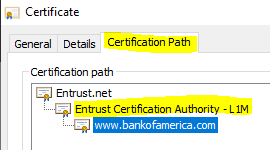
You should now see the cert. Click on the “Certificate Path” tab. Here you will see the different levels. The top would be the root and middle one is the intermediate. I have a blog post explaining this. You want to double click the middle cert and it will open up.

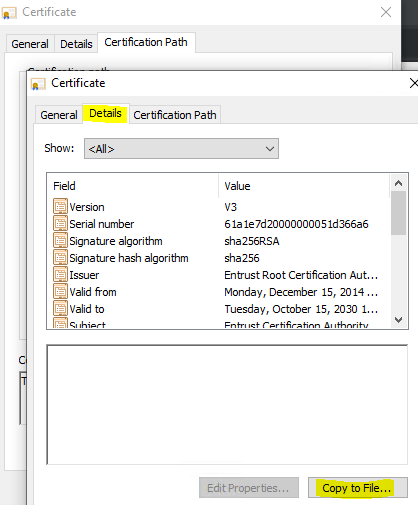
Click on the “Details” tab and click “Copy to File….”.
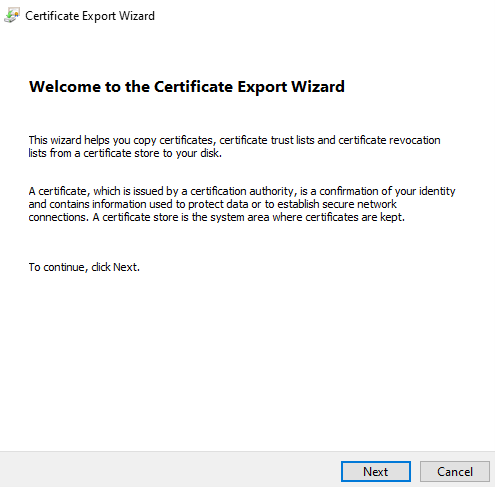
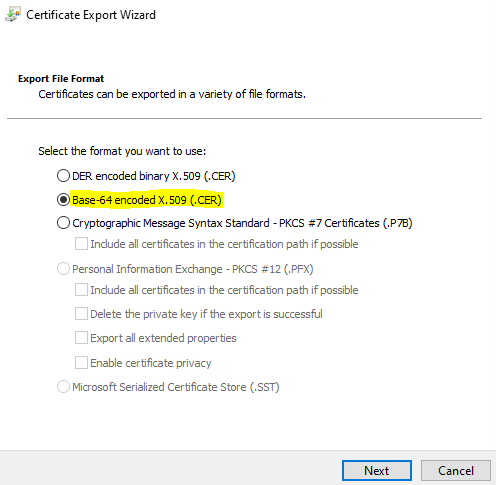
You will now start the Certificate Export Wizard
You’ll want to choose “Base-64 encoded X.509 (.CER)“:
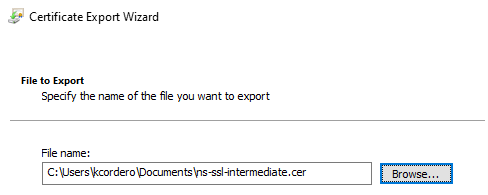
Give it name, location, and click “Next”
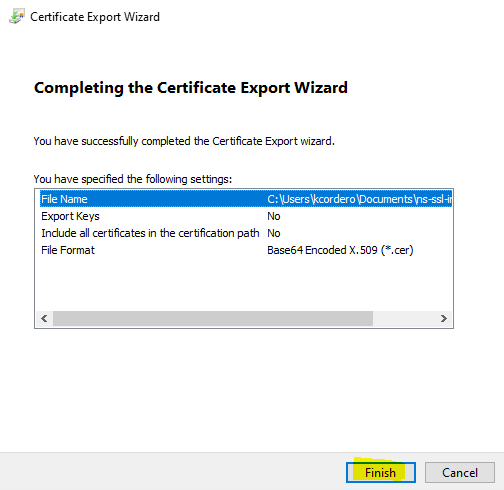
Click “Finish“. You now have the cert to import into the F5.
Now it’s time for some F5 fun.
1. Install Certificates
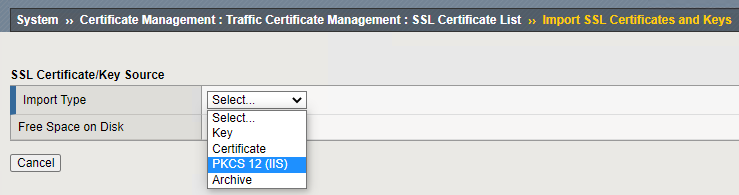
System > Certificate Management > Traffic Certificate Management > SSL Certificate List > Import…
If you don’t have your certs already, go get them from whoever you get your certs from.
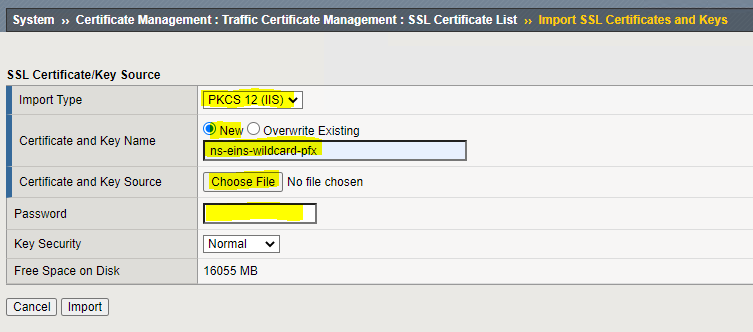
First, you’ll want to import your PFX file. Second, you’ll need to get the intermediate certificate. It’s a really easy process, just click on “Import…“:
You will now have to select the import type. For me, the servers SSL certs are PFX files but the intermediate is just a CER file. This means for my servers SSL Certs I’ll choose “PKCS 12(IIS)” and for the intermediate cert, I’ll choose “Certificate“.

After choosing your “Import Type“, you can now name your cert, choose where it’s located to import it, and then finally if you have a password, enter it there. Click “Import“. It’s that easy.
After importing your certs, it should look something like below. I have both the wildcard cert I’m going to use for my guests and the intermediate cert.

Now that the certs are imported, it’s time for the next phase, SSL Profiles.
2. SSL Profiles (Client and Server)
Since we are doing SSL Bridging where the F5 will be the termination point for the clients, it will also re-encrypt the traffic to the clusters servers sitting behind the VIP. Therefore we need to setup both the client and server SSL profiles.
Client Profile:
Local Traffic, Profiles, SSL > Client
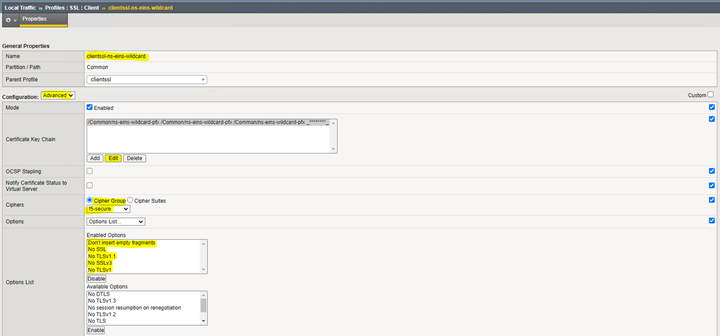
This is straight forward but there are couple things to point out. For “Ciphers“, you need to choose “Cipher Group” if you are going to keep TLSv1.3 as an option. Also, notice how I chose “f5-secure“. I’ll explain more about his later. But it’s basically only allowing secure ciphers.
One last thing, Notice how I removed the weaker ciphers.
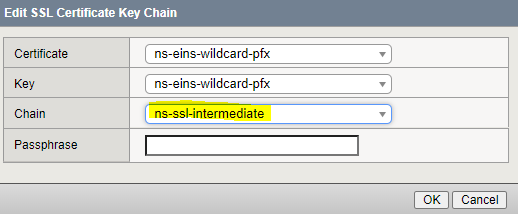
Make sure you put the intermediate cert where “Chain” is:
IMPORTANT:
Make sure you choose “Cipher Group” f5-secure and select ”No SSL, No SSLv3, No TLSv1, No TLSv1.1, & Don’t insert empty fragments”. If you don’t do this, you’ll get errors for weak ciphers when running a test on SSLab.
It’s import when you add the “Certificate Key Chain” that you choose the intermediate cert for the chain!!! If you don’t, you’ll get a “Chain Issues” when you run a test like SSLabs.
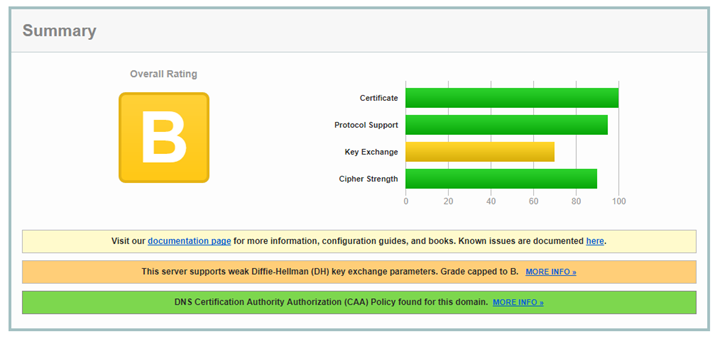
Below is an example of the issue you’ll have if you don’t do this:
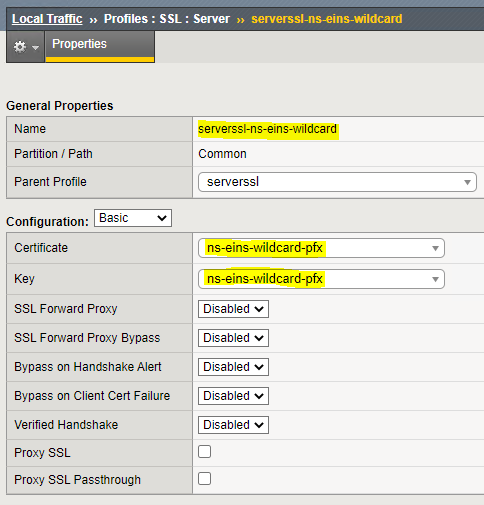
Server Profile:
This profile is a lot easier. Just choose the cert and key. This is the config that will re-encrypt the traffic back to the server. This can actually be any cert you want. As long as it’s a cert. So if you don’t want to purchase a cert, use an internal CA or free cert service like Let’s Encrypt.
3. Server Profiles (HTTP and HTTPS)
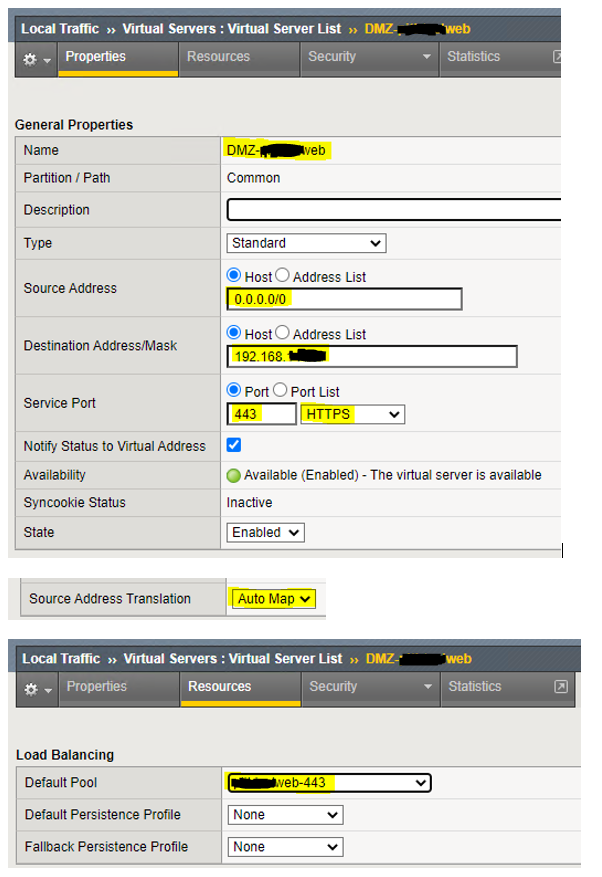
HTTPS Profile:
This is straight forward.
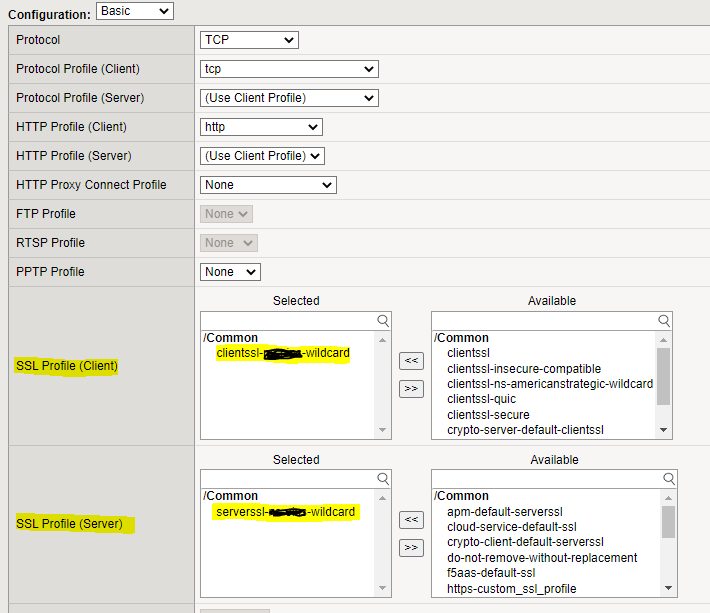
So I forgot to add the screenshot above but below you can see both SSL Profiles are being used within the Virtual Server:
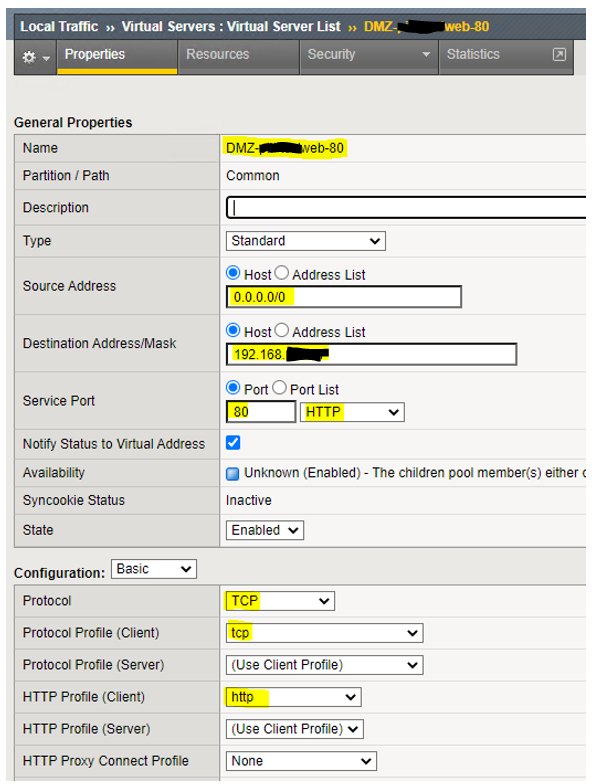
HTTP Profile:
This profile is only used for HTTP to HTTPS redirect.
Now click on “Resources“:
Here I left the “Default Pool” None and used a build-in iRule “_sys_https_redirect“.
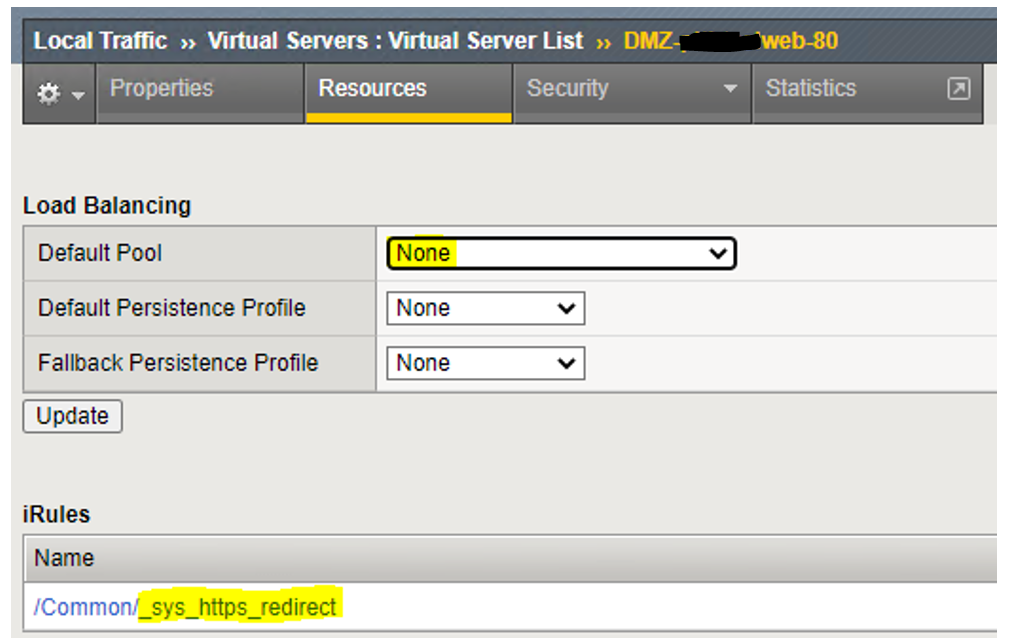
NOTE:
_sys_https_redirect is a default iRule. I created a custom one but did not need it. This will redirect HTTP/80 to HTTPS/443.
I also left the “Default Pool” to None since we don’t need it. I really don’t want to be able to hit the servers over HTTP/80. I only use this VS to redirect from HTTP/80 to HTTPS/443. The iRule should do it’s job and redirect traffic to HTTPS.
#F5-Secure Ciphers
F5 includes five default cipher rules:
f5-aes = tmm --clientciphers AES
f5-default = tmm --clientciphers DEFAULT
f5-ecc = tmm --clientciphers ECDHE:ECDHE_ECDSA
f5-secure = tmm --clientciphers ECDHE:RSA:!SSLV3:!RC4:!EXP:!DES
f5-hw_keys = tmm --clientciphers 'ECDHE-RSA-AES256-GCM-SHA384:ECDHE-RSA-AES256-SHA384:ECDHE-RSA-AES256-CBC-SHA:DHE-RSA-AES256-GCM-SHA384:DHE-RSA-AES256-SHA256:DHE-RSA-AES256-SHA:ECDH-RSA-AES256-GCM-SHA384:ECDH-RSA-AES256-SHA384:ECDH-RSA-AES256-SHA:AES256-GCM-SHA384:AES256-SHA256:AES256-SHA:ECDHE-RSA-DES-CBC3-SHA:DHE-RSA-DES-CBC3-SHA:ECDH-RSA-DES-CBC3-SHA:DES-CBC3-SHA:ECDHE-RSA-AES128-GCM-SHA256:ECDHE-RSA-AES128-SHA256:ECDHE-RSA-AES128-CBC-SHA:DHE-RSA-AES128-GCM-SHA256:DHE-RSA-AES128-SHA256:DHE-RSA-AES128-SHA:ECDH-RSA-AES128-GCM-SHA256:ECDH-RSA-AES128-SHA256:ECDH-RSA-AES128-SHA:AES128-GCM-SHA256:AES128-SHA256:AES128-SHA:RC4-SHA:RC4-MD5:DHE-RSA-DES-CBC-SHA:DHE-RSA-CAMELLIA256-SHA:CAMELLIA256-SHA:DHE-RSA-CAMELLIA128-SHA:!TLSv1:!TLSv1_1:!SSLv3:!DTLSv1
You can choose any one of these. I chose f5-secure.
#F5-Secure Cipher Rule
We can actually look at what cipher suites the F5 is using with this command.
admin@(f5l-bigip1)(cfg-sync Standalone)(Active)(/Common)(tmos)# show ltm cipher rule f5-secure

--------------------
Ltm::Cipher::Rule
--------------------
Name f5-secure
Cipher Suites ECDHE-RSA-AES128-GCM-SHA256/TLS1.2:ECDHE-RSA-AES128-CBC-SHA/TLS1.0:ECDHE-RSA-AES128-CBC-SHA/TLS1.1:ECDHE-RSA-AES128-CBC-SHA/TLS1.2:ECDHE-RSA-AES128-SHA256/TLS1.2:ECDHE-RSA-AES256-GCM-SHA384/TLS1.2:ECDHE-RSA-AES256-CBC-SHA/TLS1.0:ECDHE-RSA-AES256-CBC-SHA/TLS1.1:ECDHE-RSA-AES256-CBC-SHA/TLS1.2:ECDHE-RSA-AES256-SHA384/TLS1.2:ECDHE-RSA-CHACHA20-POLY1305-SHA256/TLS1.2:AES128-GCM-SHA256/TLS1.2:AES128-SHA/TLS1.0:AES128-SHA/TLS1.1:AES128-SHA/TLS1.2:AES128-SHA/DTLS1.0:AES128-SHA256/TLS1.2:AES256-GCM-SHA384/TLS1.2:AES256-SHA/TLS1.0:AES256-SHA/TLS1.1:AES256-SHA/TLS1.2:AES256-SHA/DTLS1.0:AES256-SHA256/TLS1.2:CAMELLIA128-SHA/TLS1.0:CAMELLIA128-SHA/TLS1.1:CAMELLIA128-SHA/TLS1.2:CAMELLIA256-SHA/TLS1.0:CAMELLIA256-SHA/TLS1.1:CAMELLIA256-SHA/TLS1.2:ECDHE-ECDSA-AES128-GCM-SHA256/TLS1.2:ECDHE-ECDSA-AES128-SHA/TLS1.0:ECDHE-ECDSA-AES128-SHA/TLS1.1:ECDHE-ECDSA-AES128-SHA/TLS1.2:ECDHE-ECDSA-AES128-SHA256/TLS1.2:ECDHE-ECDSA-AES256-GCM-SHA384/TLS1.2:ECDHE-ECDSA-AES256-SHA/TLS1.0:ECDHE-ECDSA-AES256-SHA/TLS1.1:ECDHE-ECDSA-AES256-SHA/TLS1.2:ECDHE-ECDSA-AES256-SHA384/TLS1.2:ECDHE-ECDSA-CHACHA20-POLY1305-SHA256/TLS1.2:TLS13-AES128-GCM-SHA256/TLS1.3:TLS13-AES256-GCM-SHA384/TLS1.3:TLS13-CHACHA20-POLY1305-SHA256/TLS1.3
DH-Groups DEFAULT
Signature Algorithms DEFAULT
NOTE:
Using Multiple SSL Profiles on a Virtual Server
If you have a VIP with multiple domains behind it.
For example, you have 1 physical server hosting multiple domains on it but obviously you have multiple physical servers in a cluster or pool:
cordero.me <DEFAULT>
cordero.com
cordero.net
You will need to have three SSL Profiles for each domain, but you will have to make one a DEFAULT for SNI. You’ll see it in the SSL Profile configuration listed as “Default SSL Profile for SNI.” Just put a checkmark on ONE of the SSL profiles. You need one profile to be the default, and it must be done for both CLIENT and SERVER profiles. You’ll know you need to do it because you will get an error until you do it.